CNC Woodworking Project Foundations · KB-016
Tabs vs Onion Skin for CNC Profile Cutting
Choose and size part-retention features by stock thickness, cutting force, cleanup, vacuum area and the stage at which a profile becomes free.
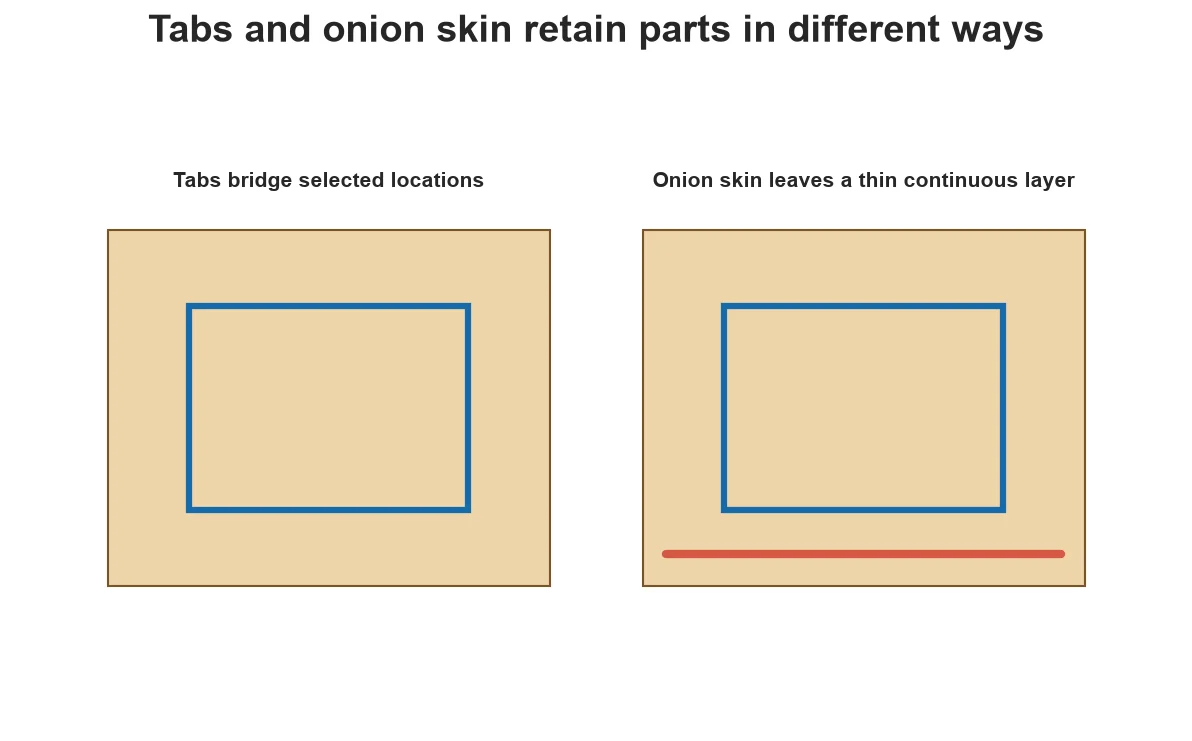
Profile cutting becomes most sensitive near the end, when the part is almost disconnected from the sheet. Tabs retain selected bridges; an onion skin leaves a thin continuous layer for a later pass or cleanup. Both require a flat reference and must be designed for the real material.
Tabs are local bridges
Tabs preserve material at selected points. Place enough to resist likely translation and rotation, avoid fragile corners where possible and consider grain or veneer weakness. Vectric distinguishes 2D tabs with vertical motion from ramped 3D tabs; software behavior and dimensions must be reviewed in simulation.
Onion skin is a continuous remainder
The profile stops short of full depth, leaving a thin layer around the part. It can preserve vacuum area and reduce individual tab cleanup, but variation in sheet thickness, stock warp or spoilboard plane can cut through unexpectedly or leave a layer too thick for the finishing pass.
Use measured material values
Nominal sheet thickness is not enough. Measure the production stock and reference plane. If a compression bit or finishing tool is involved, confirm how the retention strategy interacts with its geometry and pass depth. Never set a deeper final cut merely to compensate for unknown variation without checking table clearance.
Plan the release operation
A final pass removes the onion skin and can release every part quickly. Tabs release later during manual cleanup. Decide how parts and offcuts remain controlled at that moment. Order internal features before outside profiles and keep hands away until motion and spindle have stopped under the machine procedure.
Inspect the first nested sheet
Watch directly, check whether small parts vibrate and pause if retention weakens. Measure remaining skin or tabs after the first representative part. Update the setup from evidence rather than waiting for an ejected component.
Plan the release operation
Retention is not complete until the part can be separated without damage. Decide where a hand tool can safely reach, how the machine will be isolated and where the released part will be placed. Put tabs on robust, accessible edges and avoid cosmetic surfaces or narrow details that are difficult to trim.
Verify the final layer
Onion skin thickness depends on actual stock thickness, spoilboard condition and Z reference accuracy. Test the remaining layer and observe whether small parts shift during the final pass. A strategy that works on a large rectangle may fail on a narrow component because available vacuum area and cutting force are different.
Decision table
| Factor | Tabs | Onion skin |
| Retention | Discrete bridges | Continuous thin layer |
| Flatness sensitivity | Moderate | High |
| Cleanup | Cut/sand individual tabs | Final pass or trim entire edge |
| Vacuum support | Can lose area after separation | Preserves area until final release |
| Best verification | Inspect tab size/location | Measure remaining layer across sheet |
Worked situation
Small nested parts shift during the last pass although vacuum held the full sheet. The remaining area became too small. Use an onion skin until a controlled release pass, add appropriate tabs or redesign vacuum zoning. Increasing the original sheet vacuum cannot replace area that no longer exists.
Practical checklist
- Measure actual stock and table plane.
- Place retention away from weak features.
- Simulate release order.
- Inspect the first part before continuing.
Frequently asked questions
How many tabs are enough?
There is no universal count; size, force, material and geometry decide.
Can an onion skin be left for manual removal?
Sometimes, if the material, thickness and safe cleanup method support it.
Why did one tab disappear?
Final depth, stock variation or placement on weak material may have removed or broken it.
Sources and editorial use
Sources support the technical facts in this original explanation. Their text and images have not been republished.
- Vectric 2D Profile Toolpath — Vectric
- 10 Milling Toolpaths for Your First 2D CNC Machining Project — Autodesk Fusion
- Woodworking eTool: Routers — U.S. Occupational Safety and Health Administration