CNC Woodworking Project Foundations · KB-020
V-Carved CNC Sign Project: From Text to Finished Cut
Plan a V-carved sign around font geometry, cutter angle, board flatness, variable depth, test cuts and a finish sequence.
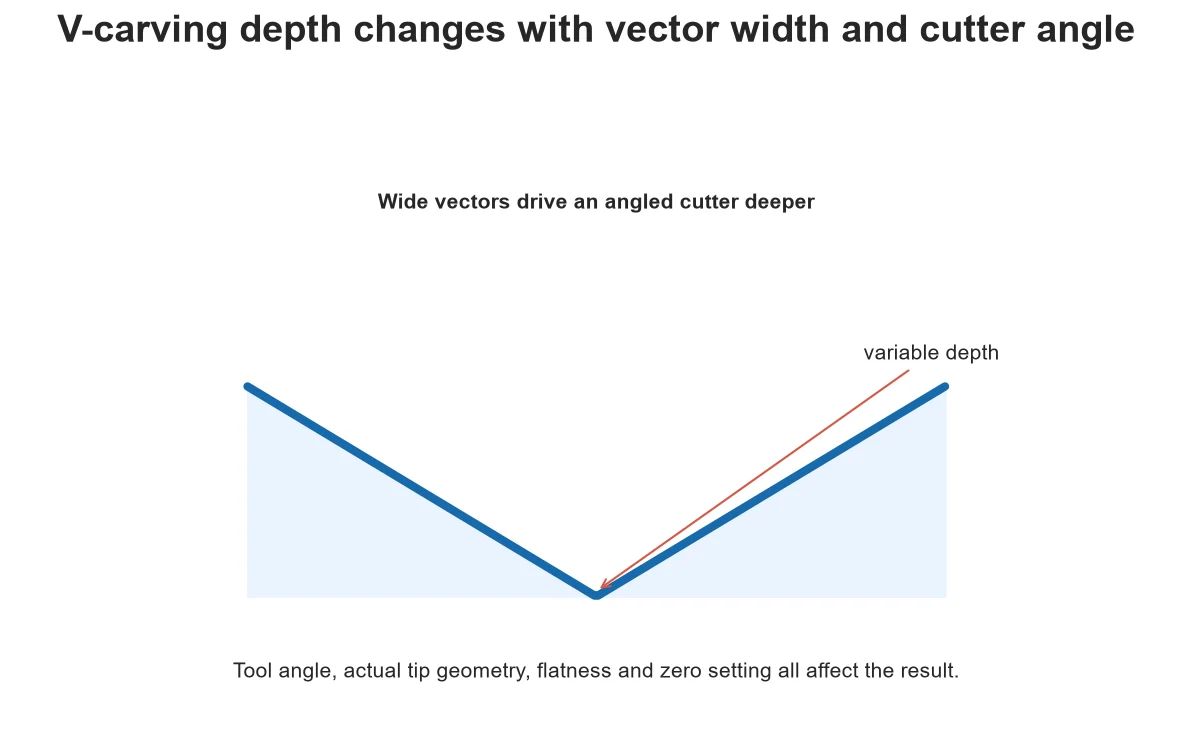
V-carving creates width by moving an angled cutter to varying depth inside vectors. That makes attractive lettering possible, but also makes the result sensitive to font geometry, actual cutter angle, tip shape, board flatness and Z zero.
Choose vectors that can be cut
Tiny gaps, overlapping contours and extremely narrow serifs can create fragile or unmachinable motion. Inspect text after conversion to vectors, preserve a copy of editable text and check islands inside letters. Do not assume a visually attractive screen font is suitable at the final physical size.
Understand variable depth
Vectric describes V-carving as using a constant-angle cutter at flowing variable depth based on vector width and shape. Wider regions drive deeper. A wrong angle in the tool database changes the calculated depth and width. A flat-tipped or worn cutter also differs from an ideal point.
Make the surface predictable
A warped board or uneven spoilboard changes effective depth across the sign. Secure stock without distorting it, establish a verified reference and consider a controlled surfacing operation when appropriate. Do not chase variation by repeatedly resetting Z at random points.
Design the finish sequence
Paint-filled carving, mask-and-cut and clear-finished wood need different preparation. Some finishes applied before carving help protect the face; others can contaminate cutting or adhesion. Test the complete stack—surface preparation, carving, color, cleanup and topcoat—on a coupon.
Verify before the final board
Cut representative letters containing narrow strokes, wide regions, inside corners and small islands. Measure depth, inspect tip detail and test cleanup. Simulate safe Z, start depth and home movement, then supervise the first full sign directly with extraction active.
Treat typography as geometry
Thin strokes, tight counters and small spacing may not support the chosen V-bit and depth. Review the calculated toolpath at the actual sign size, not only as a zoomed screen view. Simplify vulnerable details and make a small lettering sample before committing a valuable blank.
Plan the finish before cutting
Decide whether the background, letters or both will receive color and how excess finish will be removed. Seal porous material when appropriate and test the full sequence on a routed sample. The cleanest toolpath can still produce a poor sign if color bleeds into fibers or sanding rounds the crisp carved edge.
Decision table
| Observed result | Possible cause | First check |
| Letters wider on one side | Surface or Z-reference variation | Map board and spoilboard |
| Narrow strokes missing | Font/tool tip/scale mismatch | Cut representative text coupon |
| Wide areas too deep | Tool angle or vector width | Verify tool geometry and simulation |
| Paint bleeds into face | Finish/mask sequence | Test full coating process |
Worked situation
The left side of a sign looks bold while the right is faint. Before changing font or tool angle, measure board and spoilboard plane and check how workholding bends the stock. V-carving magnifies small Z variation into visible width variation.
Practical checklist
- Preserve editable text and inspect vectors.
- Verify actual cutter angle and tip.
- Check stock flatness and Z reference.
- Test the complete carve-and-finish sequence.
Frequently asked questions
Why does wider text cut deeper?
The angled cutter must descend farther to reach wider vector boundaries.
Can a V-bit be treated as a perfect point?
Real tips may be flat, rounded, worn or manufactured differently; use verified geometry.
Should a sign be painted before carving?
It depends on the finish system; test the full sequence on representative material.
Sources and editorial use
Sources support the technical facts in this original explanation. Their text and images have not been republished.
- Vectric V-Carve Toolpath — Vectric
- Wood Handbook: Wood as an Engineering Material — USDA Forest Products Laboratory
- Woodworking eTool: Wood Dust — U.S. Occupational Safety and Health Administration