CNC Woodworking Project Foundations · KB-018
Plan a CNC-Cut Tool Organizer from Real Measurements
Turn measured tools into a CNC organizer with deliberate pocket clearance, depth control, labels, workholding and a test-fit workflow.
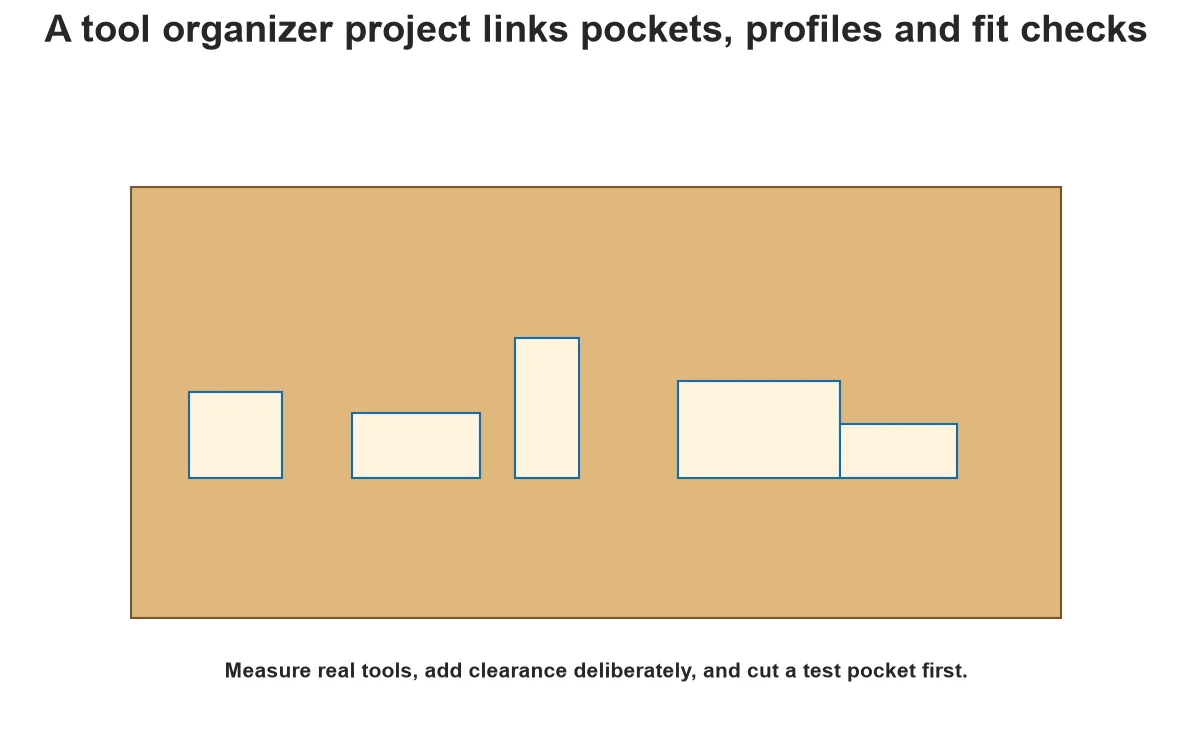
A tool organizer is a strong early project because it connects measurement, pocketing, layout and finishing without requiring complex joinery. The useful design starts from the actual tools, not generic silhouettes downloaded from somewhere else.
Create a tool inventory
Give each item an ID and record length, width, maximum diameter, contact points and fragile regions. Decide whether it lies flat, stands upright or sits at an angle. Add finger access and space for normal variation; a pocket that matches a scan exactly can be impossible to use.
Choose pocket depth from function
A shallow recess locates a tool while leaving it easy to grasp. A deep pocket protects it but traps dust and may require a longer cutter. Confirm flute and holder clearance, bottom thickness and stock flatness. Use radii compatible with the cutter and tool shape.
Arrange for workflow
Place frequently used tools near the operator and separate sharp edges. Leave enough material between pockets to preserve stiffness. Add engraved labels only after testing text size, bit geometry and finish. Avoid placing a fragile narrow wall along weak grain or over a plywood core void.
Prototype uncertainty
Cut one or two representative pockets in scrap from the same material. Test insertion, removal, side clearance and finish. Adjust the parameter controlling clearance rather than manually editing every vector. Preserve the test coupon as a setup reference.
Plan operations and retention
Surface or establish the reference if required, machine pockets and labels before the outside profile, then retain the part with suitable workholding, tabs or onion skin. Simulate depths and clearances and keep the first production run under direct supervision.
Design around retrieval
Measure the tools where they will be supported, including collars, flutes and any protective covers. Provide finger access and enough visual separation to return each item to the right location. Keep sharp edges protected and orient the organizer so a dropped item cannot easily strike a person or moving machine.
Prototype the critical pocket
Cut one or two representative pockets in scrap from the intended material. Test insertion, removal and label visibility before machining the full panel. If a tool fits poorly, update a named clearance parameter rather than editing isolated vectors. This turns the organizer into a maintainable shop asset.
Leave room for change
Reserve an open zone or use replaceable inserts for tools that may be added later. Put a revision mark on the underside and retain the measured tool list with the source drawing. Future changes can then be made from evidence instead of measuring every pocket again.
Decision table
| Design input | Measure or decide | Why it matters |
| Tool envelope | Maximum dimensions and variation | Prevents binding |
| Grip access | Finger or handle clearance | Allows safe removal |
| Pocket depth | Retention versus accessibility | Controls tool exposure |
| Web thickness | Material between pockets | Maintains strength |
| Label method | Text size, tool and finish | Keeps identification readable |
Worked situation
A caliper pocket fits the body but the thumb wheel catches during removal. Update the functional envelope to include the removal path and finger clearance. The correct pocket is not merely the smallest outline around the tool.
Practical checklist
- Inventory and label real tools.
- Add removal and finger clearance.
- Test the deepest or tightest pocket.
- Machine internal features before profile release.
Frequently asked questions
Should pockets be exact tool outlines?
Usually no. Functional clearance and removal path are needed.
What material works best?
Choose by service, finish, thickness and dust controls; test plywood or MDF behavior before production.
Can foam be added later?
Yes if the design allows its thickness, adhesive and service requirements.
Sources and editorial use
Sources support the technical facts in this original explanation. Their text and images have not been republished.
- 10 Milling Toolpaths for Your First 2D CNC Machining Project — Autodesk Fusion
- Wood Handbook: Wood as an Engineering Material — USDA Forest Products Laboratory
- Woodworking eTool: Routers — U.S. Occupational Safety and Health Administration