CNC Router Bits and Tool Selection · KB-040
CNC Router Bit Wear: When to Clean, Inspect or Replace a Cutter
Separate residue, gradual edge wear and physical damage by tracking heat, chips, finish, dimensions and tool history.
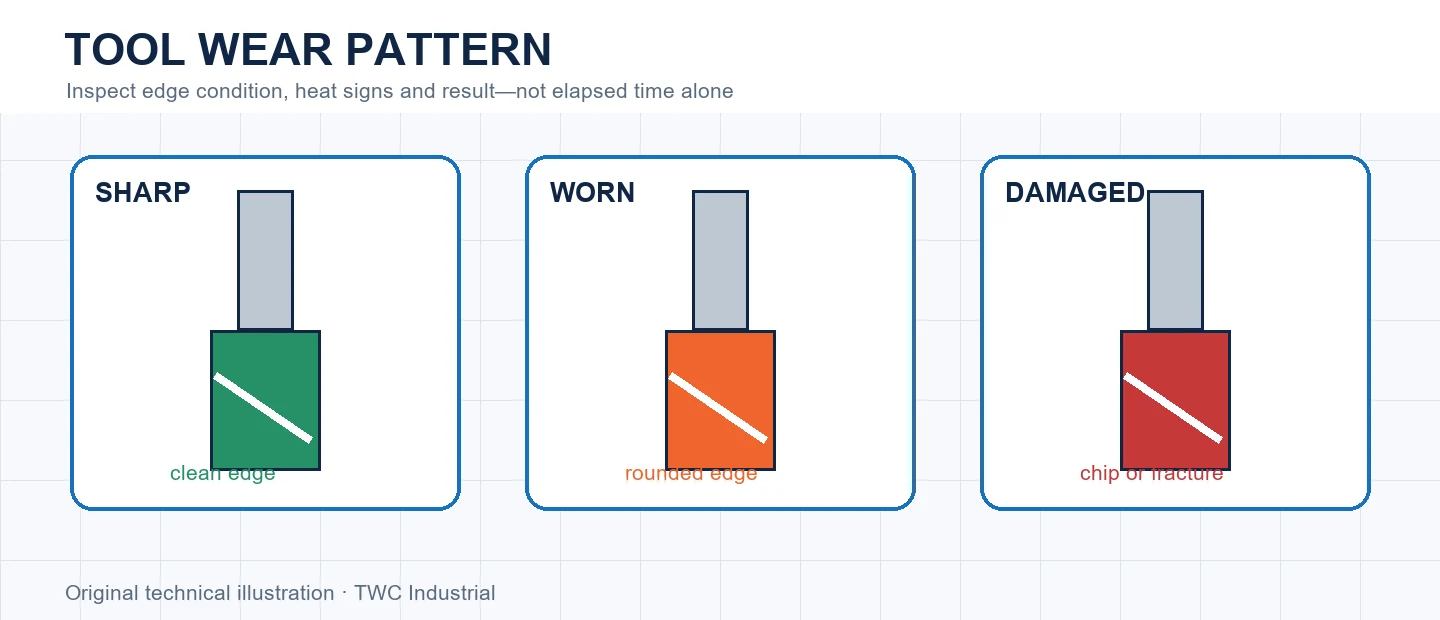
Tool life is not one universal number of minutes. Material abrasiveness, contamination, heat, chip evacuation, runout and engagement all influence wear. A useful decision combines isolated inspection with trends in the machining result.
Understand the physical relationship
A sharp edge forms chips with the geometry intended by the manufacturer. Gradual rounding can increase force and heat; a chip or fracture creates a local defect and imbalance. Resin or plastic buildup may imitate dullness but requires an approved cleaning method and renewed inspection.
Connect geometry to the cut
Wear can show as rising spindle load, smaller or dustier chips, edge fuzz, burrs, heat, dimensional drift or repeating finish marks. None is exclusive to the cutter, so compare against runout, workholding, material batch and extraction before declaring one cause.
Choose for the complete application
Assign each tool an identity and log material, approximate use, cleaning, incidents and inspection result. Set conservative review triggers based on process evidence. Remove a questionable tool from service so it cannot return to the drawer unmarked.
Run a controlled comparison
Cut representative geometry in the intended material before committing valuable stock. Hold tool identity, projection, workholding and origin constant while changing one relevant variable. Record chips, sound, heat, edge condition and measured geometry. For cnc router bit wear: when to clean, inspect or replace a cutter, a completed path is not enough; the result must show that the edge is intact and machining behavior remains consistent with the baseline. Keep the inspected coupon, photograph and CAM revision together.
Create a traceable tool record
Record manufacturer, part number, cutting diameter, shank, cutting length, flute form and measured projection. Add the tested material and operation rather than labeling the cutter only by color or drawer. Replacing tools only after catastrophic finish failure wastes stock and can ignore safety concerns. Do not transfer an unexplained offset or operating value to a visually similar tool.
Interpret the evidence before changing CAM
If the cut differs from expectation, separate tool geometry from machine calibration, material variation, workholding and engagement. Measure more than one feature and inspect whether error changes with depth, direction or time. A consistent size offset suggests a different investigation from a mark repeating once per revolution or heat appearing only in corners. For this topic, replacing tools only after catastrophic finish failure wastes stock and can ignore safety concerns. Correct the identified layer, repeat the controlled coupon and document the comparison instead of accumulating compensating settings whose purpose is no longer known.
Verify the full cutting envelope
Recalculate and simulate the cutter, shank and holder at the deepest feature, entry and retract. Confirm the physical tool matches the library and posted program. Review workholding, extraction, guarding and stop controls. A safe-looking centerline cannot prove the collet nut, dust shoe or released stock will remain clear.
Decision table
| Finding | Next step | Do not |
| Surface residue | Approved cleaning and inspect | Scrape edge carelessly |
| Gradual wear trend | Plan replacement | Hide with feed changes |
| Chip/fracture | Remove from service | Run another test |
| Unexpected heat | Stop and diagnose | Touch hot tool |
Worked situation
A familiar plywood job begins producing dust and fuzzy edges. Compare tool history, chips, heat, runout and material batch; clean only by approved method, then replace if edge condition or baseline behavior is not restored.
Practical checklist
- Track tool identity.
- Compare chips and finish.
- Inspect after cleaning.
- Quarantine damaged tools.
Frequently asked questions
Can a dull cutter be made safe by lowering feed?
Not as a general rule. Diagnose and replace or service the cutter according to manufacturer guidance.
Can a tool-library entry replace cutter documentation?
No. Confirm the exact cutter identity and manufacturer limits, then verify imported values for the actual machine and setup.
Can appearance alone prove a cutter is safe?
No. Isolate power before handling and inspect according to the cutter, collet, spindle and machine manufacturers’ procedures.
Sources and editorial use
Sources support the technical facts in this original explanation. Their text and images have not been republished.
- The Router Way: Tool Selection and Chip Load — LMT Onsrud
- Woodworking eTool: Routers — U.S. Occupational Safety and Health Administration
- CNC Router Bit Selection Poster — Amana Tool